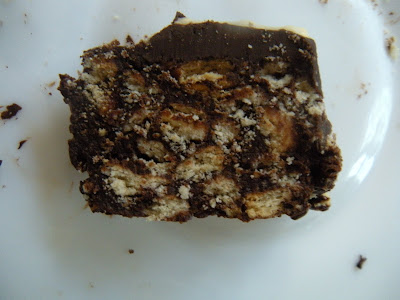
I may not have been invited, but I wouldn't miss the royal wedding celebration! My phone actually rang at 4:30 a.m. so I decided I may as well get up and watch. The plan was to record it and watch it with my book club later in the afternoon. It turned out to be a blessing seeing it in the quiet morning hours snuggled in bed. When we watched it this afternoon, drinking champagne and eating canapes, we talked and laughed and missed a lot of the commentary. But we looked good. Mary pulled out her flashy costume jewelry. Cyndi had a stylish hat, and there were a few tiaras, my own included which was connected to my First Communion Veil. When we decided to have a watch party, we knew we had to have the royal food. All the food blogs and sites I read daily were covering varying aspects of the royal wedding menus. I decided to make William's cake. From what I gather, it is actually the Queen's favorite, and William has always loved it. He chose it as his Groom's cake, but cake is a stretch. It is officially called Chocolate Biscuit Cake. I found the recipe on Epicurious.com but of course I didn't make it as posted.
A few notes. A biscuit in England is what we would call a cookie. A rich tea biscuit is a fairly dry flavorless cookie. I couldn't find the brand in the recipe, so posted the brand I did find. The original recipe calls for 8 oz of cookies, the package is 10.6. What would I do with the extra biscuits? I'm a baker, eating them out of the package was not an option. So I starting beefing up the recipe a bit. I didn't have the tube pan they recommended, but I have these small springform pans. So I ended up with 3 pans of "cake". Now, mind you this is not baked. So here is my version.
Chocolate Biscuit Cake
1/2 teaspoon butter, for greasing pans
10.6 ounces Burton's rich tea biscuits
1 stick unsalted butter, softened
1/2 cup granulated sugar
8 ounces dark chocolate
2 eggs, beaten
10-12 ounces dark chocolate, for icing
1 ounce white chocolate, for decoration
1. Lightly grease a small (such as 6 x 2 1/2-inch) cake ring with 1/2 teaspoon butter, and place on a parchment-lined tray. Break each of the biscuits into almond-sized pieces by hand and set aside. Cream the butter and sugar in a bowl until the mixture is a light lemon color.
2. Melt the 8 ounces of dark chocolate in a double boiler. Add the butter and sugar mixture to the chocolate, stirring constantly. Add the eggs and continue stirring. Fold in the biscuit pieces until they are all coated with the chocolate mixture.
3. Spoon the chocolate biscuit mixture into the prepared cake ring. Try to fill all of the gaps on the bottom of the ring, because this will be the top when it is unmolded. I pressed it down to kind of pack it in. Cover in foil and chill the cake in the refrigerator for at least three hours.
4. Remove the cake from the refrigerator, and let it stand while you melt the 10-12 ounces of dark chocolate for icing. Slide the ring off the cake and turn the cake upside down onto a cooling rack. Pour 10 ounces of melted dark chocolate over the cake, and smooth the top and sides using a butter knife or offset spatula. Allow the chocolate icing to set at room temperature. Carefully run a knife around the bottom of the cake where it has stuck to the cooling rack, and transfer the cake to a cake dish. Melt the white chocolate and drizzle on top of the cake in a decorative pattern.It is an interesting combination, and rather addictive. Crunchy biscuit, smooth, dark chocolate. I liked it best chilled. I discovered that although I have a bag of royal icing in my hands most days, writing with melted white chocolate is a a bit more of a chore. It came streaming out of the tiniest hole in my pastry bag. And, it was a little hot. But the cakes were a hit, and I put the extra 2 in the freezer so when my Queen Mum and Princess Sisters visit in a few weeks they can have a nibble.
Cheers to Kate and Will, or, more appropriately now, cheers to William and Katherine. It was quite a day...for us all!
Friday, April 29, 2011
Monday, April 25, 2011
Something Borrowed
Every once in awhile something big comes along, and today is a pretty big day in Memphis. We had some tornado warnings earlier this afternoon, (probably more to come tonight), our hometown NBA team the Grizzlies, are playing Game 4 in the playoffs downtown tonight, and the movie Something Borrowed which is slated to open May 5, has a mini premiere right here in Memphis. Here's the trailer for the movie, which looks adorable.
Why Memphis? Well, the movie stars Ginnifer Goodwin, a Memphis native, and is directed by Molly Smith, also a Memphis native (and alum at our favorite all girl's high school). So they are having a family and friends event tonight and were making gift bags for the attendees. And, they needed something sweet.
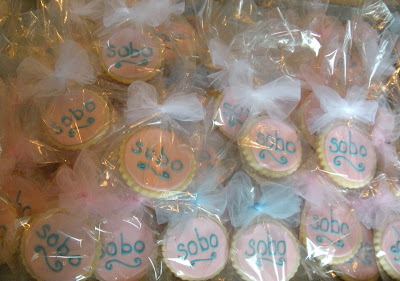
So, if you needed logo cookies and diamond ring cookies who would you call? Me! It turns out the gal that emailed me had my cookies at a baby shower, and she thought they were cute and delicious! So I baked and piped and glittered and bagged and bowed! They are pretty darn cute. My dining room was taken over! The theme of the movie, obviously, is a pending wedding, thus the diamond ring cookies.
They are iced and then "painted" with a food safe silver and and the facets of the diamond are glittered with the most fabulous edible glitter. The logos are a simple "sobo" which I am guessing they used as the slang term for the movie since the title is so long.
So, we'll all have to wait until next week to see the movie, but tonight, I will start on the book, and nibble a few reject cookies. This is my first movie premiere, I did TV pilot cookies a while back (and got tweeted). Who knows what's coming next! This week, no baking. But I'll be back in there next week! So, what are you waiting for?
Thursday, April 21, 2011
Easter Cookies
Ah, Easter. A holiday of such promise. Last year I was tackling all kinds of Easter cookies. This year, I refined it a bit. However, as I was rolling and cutting I got to the end of the dough, had used all the cutters and realized I had no eggs! I had put the egg cookie cutter in the bucket of Shapes not Spring and Easter. The problem is when you are hoarding hundreds (yes, quite plural) of cookie cutters, you have to have some sort of system. Mine has a few issues, but I keep thinking "When I move..." Geez, this new, imagined house of mine is going to be pretty amazing if I it can do all the things I'm thinking will happen by simply moving. And then after I was elbow deep in royal icing, I came across the cutest assortment of Easter cutters. But I have a HUGE thing in my future, just wait til you see what I'm working on that I said, "No more Easter cookies."
I did these carrots for a friend...even her pooch got a personalized cookie. My kind of dog owner.
I made these bunnies last year, but when I saw this amazing post, I knew I had to have chubby cheeked bunnies. Sweet Sugar Belle is a very talented cookie designer who generously shares tips and techniques for decorating cookies. The bunnies are so cute!
I did a few colorful butterflies and some simple little daisies. Great colors for the springtime!
The "peeps" I did earlier, got a sanding sugar makeover. The colors are now a little more gentle. The lemon cookies have become part of my repertoire. They have been well received and stay soft. I need to make sure people know they are chock full of lemon zest, because you are apt to bump into that zest while munching them!
And finally, another graduation party. This is a sampling of the cookies for the girls done in their new school colors and a pennant too!
Looking forward to a family weekend. Happy Easter!
Tuesday, April 19, 2011
Happy Joe's Taco Pizza
I am a pizza lover. Love, love, love it. My favorite meal is pizza and beer. Can you believe it? I am this foodie writer, I'll eat anything, and my favorite meal would be pizza. My sister affectionately calls pizza "Circles of Death." I say, ya gotta go somehow, why not with a delicious whole wheat crust, hot, stretchy mozzarella and delicious toppings?
I make a lot of pizza. Mardi Gras Pizza with crawfish, peppers and andouille, Muffaletta Pizza with meat and cheese and yummy olive salad, Grilled Pizza with anything on it, and a few weeks ago a Caesar Salad Pizza, stupendous. But this week I was at the grocer, and there on the shelf was Taco Doritos, they even came in the throwback bag from the 70's. Taco Doritos mean only one thing...Happy Joe's Taco Pizza.
Happy Joe's is an institution in Eastern Iowa. It started in 1972 in Davenport, Iowa in an area known as the East Village. A charming street of shops, bars and restaurants. Happy Joe's was an old time ice cream parlor up front, pizza restaurant in the back. The floors were wood, there were barrels of taffy and candy sticks and an old fashioned bar where you could order ice cream sundaes and banana splits in a tulip glass complete with a sugar wafer. In the old days, the wait staff girls wore the cutest red and white short dresses with a little fluff in the skirt. Red and white saddle shoes rounded it out and the guys wore vests and straw hats. On your birthday they would honk an old fashioned bike horn and they would all sing to you and bring you a sundae.
Times have changed, the ice cream parlor is gone, the original Happy Joe's is gone, but the pizza has not changed and they boast more than 50 stores in the Midwest. Thank the Lord. Their signature pizza is Canadian Bacon and Sauerkraut. Trust me, it is a tasty pie. But my all time favorite is Taco Pizza. Forget any Mexican type pizza you have ever had, there is no comparison. Until today that is, I have finally mastered the taco pizza at home. Now I would really rather be at a Happy Joe's, but boy was my family excited when we had dinner tonight!
You will notice this Taco Pizza has no jalepeƱos, no salsa, no cilantro. This is not a pizza of 2011, this is a pizza of my childhood. Don't mess with it!
One recipe I found online is here at Pizza Maniac posted way back in 2004. He puts black olives on his, although I can't remember them on the original, and I didn't have any on hand. He also never mentions Happy Joe's, but most of the comments do. You see, people like me, never forgot how delicious that pizza is long after we move away.
I started with this whole wheat dough ball from the Fresh Market. They are super easy and work great in the oven and on the grill. I like to thaw them overnight in the fridge, although a half hour or so on the counter will do it too. One dough ball will make a pizza big enough for about 4 people (or 3 really hungry ones). When we do build your own pizza night, we split the dough into 2 pieces and make individual ones, with pizza leftover.
Happy Susie's (Joe's) Taco Pizza
2 dough balls
1 can refried beans (best to find the kind that are smooth, my Rosarita were too chunky)
Taco Sauce (I buy Happy Joe's, but there are brands at the grocer. This is not salsa)
Pizza Sauce (less than 1 cup)
1 pound ground beef
1 packet taco seasoning
Mozzarella cheese, shredded
Colby jack cheese, shredded
Shredded lettuce
Chopped tomatoes
Taco Doritos
Brown the ground beef, drain any excess fat. Add taco seasoning and a little water. When it is cooked through, remove from heat and let cool slightly.
Roll out, stretch, toss your crusts until they are the desired thinness. Preheat oven to 480° degrees. I baked my pizzas on a pan, but the crust did not get sufficiently crunchy, perhaps a stone would be better, or grilled is always good.
Mix taco sauce, beans and pizza sauce together. How much? Well, I used about ½ can of beans and ¼ cup taco sauce and ¼ cup pizza sauce. You can alter it to your own taste. Spread this over the crust. Top with a mozzarella, then ground beef, then Colby Jack.
Bake until cheese is bubbly and crust is golden, about 10 minutes in my convection. Let sit for a few minutes to allow cheese to set a bit and slice pizza. Then cover the pie with lettuce, tomatoes and Doritos (crush them into manageable pieces). Serve with additional taco sauce. It is, in many ways a taco salad on a pizza. It is not easy to eat, toppings fall off with every bite. But when you have nibbled the last of the crust, there is a little "salad" on the plate. I have to admit, I am quite enamored these days with salad on my pizza. The California Pizza Kitchen's Club Pizza is a perfect example. I am looking forward to my trip to Iowa this summer so I can indulge in the real deal at Happy Joe's. Until then, get in there and make it yourself!
Thursday, April 14, 2011
Cookie Round Up
So bake, bake bake. I did these great cookies for a graduation luncheon some friends were hosting. The girls names and a pennant with their college choices in the school colors. They were bagged and tied in the color scheme of the school. I thought they were quite cute. We even did one for the mom of the honored graduate. After much debate we decided on the Arkansas Mom cookie in hopes her daughter wouldn't buy her a t-shirt with that printed on it! They had a couple of undecided girls, but National Decision Day is historically May 1, so they have a few weeks before they commit!
Since I was baking, I decided to make a few neck tie cookies...a good Father's Day cookie and good for our all boys school where the boys wear a tie everyday. I also made up some coffee cup cookies, they have this slit so they will sit on the rim of a coffee cup. I bought these cutters because they were dirt cheap, and they are a great size for a sweet. I did a quick icing job on them and discovered most of my mugs have too wide a rim for the photo, but I found one that works. I sent them to school as a thank you to the most amazing high school counselor ever. (No Decision Day looming for us, my daughter committed in July!)
I also made up some quickie Happy Birthday cookies for my hairdresser. She wasn't expecting them, so how fun to find them in the mailbox?! And a week after her birthday...double surprise! I also made these groovy water ski cookies for a guest blog I am writing in May, there will be more info on that coming soon. A few Thank You cookies for someone who really wanted a co worker to know how appreciated they were.
And a few ice cream cones. I have this little cutter and just wanted to see it done. I have some ideas to be working out on this. So that's it for now. Next week, EASTER! For now, get in there and bake!
Monday, April 11, 2011
Pixie Espresso
I am an admitted food snob. However, when it comes to coffee, I am so not picky, I just like it with a little half and half. I switched hotels once traveling with a volleyball team because they only had powdered creamer in the breakfast room. Blech! I have never been much of an espresso or cappuccino drinker. I have tried it at Starbucks, in Italy, after a nice meal, but it never really did it for me. Then I found Nespresso. This is a cool, European company that makes various espresso machines that are sleek and small and you can only use their coffee capsules. At 3 o'clock when I am at work, I am warming up one of the demo machines at work and making a decaf.
This is not a sales pitch, but let me tell you about this. I bought the newest machine called the Nespresso Pixie, it is exclusive to WS. Yes, I get an employee discount, and I make a small hourly wage, but no one pays me or asks me to endorse the WS product line here. I just love this, okay? The price was right at $250, I have sold machines at 10X that price. The machine has 19 bars of pressure which means that coffee is pressed out at such high pressure, it makes a natural crema on top of the coffee. It is so smooooth. This is not fill a mug kind of coffee, this is a shot of great coffee. It will never replace my morning pot, but it has replaced my instant decaf I like after dinner, I mean it came in a bag and was brewed like tea, and frankly, it stinks. So let's just say this is a major improvement! The machine comes in some really hot colors. Orange, cobalt blue, steel blue, Bright green and others. I was a little boring and went steel blue, but it is pretty and goes with everything. The capsules are ordered online and they are at my door in 48 hours. No flavors, but different blends, roasts and robustness. The very best decaf to ever have crossed my lips.
So I have it all set up and ready to go. But no espresso cups. I have been using my coffee mugs, but my pretty little shot was sort of lost in the depths of the mug. At the store we have the Apilco French porcelain, but I really didn't want plain white, although that is all you see in the Italian coffee houses. I thought about where I would find cool cups, and then I remembered a box my sister brought me a while back. Wrapped up in tissue was a coffee set. The copper pot looks like a Turkish coffee maker. The cups are copper with white porcelain inserts and there is also a creamer and sugar. I took down a couple of cups and saucers and polished them up. Imagine my surprise as I am rubbing the copper clean and the bottom says they are quadruple silverplate. ??? Okay, so it isn't solid copper, but they cleaned up okay and are the perfect size for a shot of espresso. I called my mom and she told me these were a wedding gift to my Grandma and Granpa Petitti from my Aunt Molly and Uncle Mike Carioselli. I never met my grandparents, but I remember my Aunt Molly and Uncle Mike quite well. I just have to tell you, my coffee is that much tastier thinking my little cups are almost 100 years old and were a treasured gift to my immigrant grandparents. So, when you get in there and bake, think of a little shot of great coffee as the perfect accompaniment!
Thursday, April 7, 2011
Ingredient: Cocoa
I know, preach, preach, preach. But here's the thing. If you want delicious food, you have to start with delicious ingredients. Period. End of story. There are tricks, short cuts and money saving tips, but some things have to be done in a certain way to achieve the best result. So I decided I am going to try and demystify some of these ingredients that you should know about.
Today is cocoa. I was baking my go-to decadent Espresso Brownies that I have been making for years. The recipe is from Williams Sonoma and were part of a cooking class I taught there. They are fairly easy to make and are a show stopper in their simplicity and their sheer chocolate decadence. So when I jumped to the WS website to get the recipe for this party, I read the reviews. And everyone was 5 stars and just crazy about them. And then, one poster gave it a poor review and said she used Hershey's cocoa, not Dutch processed. Fail. And my post was a little terse. (Good ol' WS edited it, my poison pen needs editing sometimes). And I am not wanting to sound witchy, honest. So I thought maybe not everyone knows there is a difference between natural cocoa and Dutch-processed cocoa, (beside price) I can teach the difference! At least to my loyal few. So what is the difference? Let's talk about cocoa. Natural cocoa is made by removing all of the cocoa butter from the cocoa liquor. Then this dry cake is ground to a powder. It is very bitter on its own, and therefore is used only in baked goods. The acid content is so high, it can actually be used as a leavening. This is what Hershey's and Ghirardelli cocoas are. There are many recipes that call specifically for this type of cocoa. It is lighter in color and is always baked or cooked. You wouldn't dust a dessert with this cocoa or roll truffles in it. You can see the darker, deeper cocoa on the left is Dutch-processed, the cocoa with the reddish tint is the natural cocoa. Dutch-process cocoa is natural cocoa that has been treated with an alkaline solution to reduce the natural acidity, thereby reducing the bitterness. This makes the cocoa darker and smoother. Traditionally these cocoas were imported and of course my favorite is Pernigotti. It's Italian (just like me), is found at Williams Sonoma (just like me), and has been around since 1860, so it is just about a hundred years older than me. It has a hint of vanilla which adds to the mellow flavor and I would never substitute anything else! Obviously the process is Dutch based, so there are Dutch brands available as well.
A well written recipe will tell you natural cocoa or Dutch-processed. You need to follow the recipe, because as you have heard time and again, baking is one big chemistry experiment. Acids and bases have a part in the baking process. If you peruse some high quality baking cookbooks, you will find good bakers have preferences in cocoa, many I have never heard of but would love to try. The thing to watch for is whether it is natural or Dutch and don't interchange the two.
So here is the recipe that spawned this post. And if the Hershey baking poster came here to find out who SweetiePetitti was telling her not to skimp on ingredients, welcome, and I hope you will try Dutch-processed in the recipe. I promise you will have much better results. And many thanks to one of my favorite baking books In the Sweet Kitchen by Regan Daley. I garnered much of my cocoa knowledge from her.
Chocolate Espresso Brownies
Ingredients:
3/4 cup all-purpose flour
1/2 cup unsweetened Dutch process
cocoa powder
3 Tbs. instant espresso powder
1/4 tsp. baking powder
1/4 tsp. salt
8 Tbs. (1 stick) unsalted butter, cut into pieces
2 oz. semisweet chocolate, coarsely chopped
2 eggs
1 cup firmly packed light brown sugar
1 tsp. vanilla extract
Preheat an oven to 350°F. Generously grease an 8-inch square baking pan.
Sift together the flour, cocoa powder, espresso powder, baking powder and salt into a bowl; set aside.
In a small, heavy saucepan over low heat, combine the butter and chocolate and heat, stirring occasionally, until melted, about 2 minutes. Remove from the heat and let cool slightly.
In a bowl, whisk together the eggs and brown sugar until blended. Gradually stir in the chocolate mixture until blended. Stir in the vanilla, then add the flour mixture and stir until blended.
Pour the batter into the prepared pan. Bake until the edges pull away from the sides of the pan and the center is springy to the touch, about 25 minutes. I bake at a lower temperature and for less time because I use convection bake. Transfer the pan to a wire rack and let cool.
For the glaze:
1/4 cup heavy cream
1 tsp. instant espresso powder
4 oz. semisweet chocolate, chopped
Pinch of salt
16 chocolate-covered espresso beans (optional)
In a small saucepan over medium heat, combine the cream and espresso powder and heat, stirring, just until the powder is dissolved and bubbles start to appear around the pan edges. Add the chocolate and salt, remove from the heat and stir just until the chocolate is melted. Let cool to room temperature.
Using a small offset spatula, spread the cooled glaze over the cookie in a thin layer. Refrigerate until the glaze is set, about 30 minutes. Cut into 1 1/2-by-2 1/2-inch bars or 2-inch squares. Top each bar with a chocolate-covered espresso bean. Makes 16 bars.
Adapted from Williams-Sonoma Collection Series, Cookies, by Marie Simmons (Simon & Schuster, 2002).
So, what are ya waiting for? Go get BOTH kinds of cocoa and bake!!!
Sunday, April 3, 2011
Lemon Sugar Cookies
What happens when a baker posts on Facebook that the ovens are fired up and looking for baking ideas? Well, everyone tells you what they are craving. Last week an old friend piped up she loves lemon cookies. Hmm, me too. So I looked around and found a lemon buttermilk rolled cookie and decided to give it a whirl.
My quest started with a book I was gifted for Christmas, The Art of the Cookie by Shelly Kaldunski. It's a nice little book, great photos, to date I have only made one other cookie in it, the Chocolate Dipped Coconut Meringues. I would like to eat one of those right now... but I digress. Lemon Buttermilk Cookies
3 cups flour
¾ teaspoon baking soda
½ teaspoon cream of tartar
¼ salt
¾ cup unsalted butter, room temp
1 cup sugar
1 large egg
2 T grated lemon zest
3 T buttermilk
1 teaspoon lemon juice
Mix first four dry ingredients in a bowl and set aside. In a mixer, cream butter and sugar. Add egg and zest until well mixed. Add flour, mix and add buttermilk and lemon juice. When dough is mixed, wrap in plastic wrap and chill at least an hour. Roll out on a well floured surface and bake in a preheated 350° oven for about 12-15 minutes. I bake on convection so I bake at 340° for 7-9 minutes. Cool completely and ice as desired. I rolled and cut my cookies with small Easter cutters. I spread them with a little royal icing and then covered them in sanding sugar. They are sort of "Peep" like, and quite adorable. You can see the lemon zest in the cookies and because of the buttermilk, they have a little softer texture. I bagged up a bunch and mailed them off to Iowa to my friend. I froze the rest and will get to them closer to Easter. So, here you go, spring baking. What are ya waiting for? Get in there and bake!
Friday, April 1, 2011
Chocolate Mocha Cupcakes
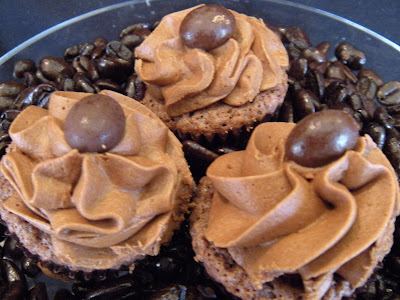
Jeez, you'd think I was hormonal with all these chocolate posts! But here we go again! We had a fundraising event for Project Graduation, and played Tournament Whist! I really thought about making sugar cookies with the card suits on them, but I had a busy week. And as it turned out, another sugar cookie baker did! Then my friend's birthday was the day before, and her very favorite Sweetie is chocolate cupcakes with mocha buttercream. So why not?!
Chocolate Cupcakes
⅔ cup flour
2 ½ Tablespoons Pernigotti Cocoa
¾ teaspoon baking powder
¼ teaspoon salt
3 oz. bittersweet chocolate, chopped
11 Tablespoons unsalted butter
¾ cup plus 2 Tablespoons Sugar
3 eggs
1 teaspoon vanilla
1 Tablespoon Trablit or strong espresso
Preheat oven to 350° ( I drop it to 340° because I use convection). Whisk first 4 ingredients in a bowl. Melt the chocolate and butter either in a double boiler or gently in microwave. Stir until smooth and allow to cool for about 10 minutes so your eggs won't scramble in it. Add the eggs, one at a time, stirring well after each. Add vanilla and espresso and fold into he flour mixture without over mixing. Fill cupcake liners and bake around 12 minutes for minis and 20 for regular size cupcakes. Keep an eye on them, you do not want to overbake. Cool completely before frosting. Makes 5 dozen minis.
Mocha Buttercream
4 oz. unsweetened chocolate
2 teaspoons instant espresso powder
11 Tablespoons unsalted butter at room temp
2 cups powdered sugar
⅓ cup milk
1 teaspoon vanilla (I also add a teaspoon of Trablit)
Melt the butter carefully in microwave. Mix in espresso powder and set aside. Beat butter with mixer until fluffy and add cooled chocolate and mix well. Add powdered sugar and milk alternately. Add vanilla and Trablit and mix until smooth and frosting consistency.
Frost cooled cupcakes, and call Diane. These are her favorite! Trust me, baking is way more fun when you do it for someone who truly appreciates it. So, get in there!
Subscribe to:
Posts (Atom)